FluentCRM Cron Job: How to Set Up a Cron Job for FluentCRM?

FluentCRM is a powerful customer relationship management (CRM) plugin for WordPress that helps businesses manage their contacts, automate marketing campaigns, and track customer interactions. One important aspect of FluentCRM is its ability to schedule and execute tasks at specific intervals using a cron job. In this article, we will guide you through the process of setting up a cron job for FluentCRM.
-
Steps to Set Up a Cron Job for FluentCRM
- 1. Open the wp-config.php file
- 2. Look for the section /* Add any custom values between this line and the "stop editing" line. */ /* That's all, stop editing! Happy publishing. */
- 3. Add the following line of code between these two lines: define('DISABLE_WP_CRON', 'true');
- 4. Save the wp-config.php file
- 5. Open FluentCRM Settings
- 6. Go to Tools
- 7. Click on Cron Job Status
- 8. Confirm that the cron status is regular and healthy
- 9. If the default PHP-based scheduled job running is not disabled, follow the steps above to disable it
- 10. Set up a cron job on your server using the following command: */1 * * * * wget -q -O - https://yourwebsite.com/wp-cron.php?doing_wp_cron >/dev/null 2>&1
- 11. Replace "yourwebsite.com" with your actual website domain
- 12. Save the cron job configuration
- 13. Test the cron job by waiting for the specified interval and checking if the scheduled tasks are being executed properly
- 14. If the cron job is not working, check the server logs for any errors and troubleshoot accordingly
- 15. Make sure to monitor the cron job regularly to ensure that it is running smoothly and the scheduled tasks are being completed as expected
Steps to Set Up a Cron Job for FluentCRM
1. Open the wp-config.php file
The first step is to open the wp-config.php file of your WordPress installation. This file is located in the root directory of your WordPress site.
2. Look for the section /* Add any custom values between this line and the "stop editing" line. */ /* That's all, stop editing! Happy publishing. */
Once you have opened the wp-config.php file, look for the section that contains the comment /* Add any custom values between this line and the "stop editing" line. */ /* That's all, stop editing! Happy publishing. */. This section is typically located towards the end of the file.
3. Add the following line of code between these two lines: define('DISABLE_WP_CRON', 'true');
To disable the default PHP-based scheduled job running in WordPress, add the following line of code between the two lines mentioned in the previous step: define('DISABLE_WP_CRON', 'true');
4. Save the wp-config.php file
After adding the code to disable the default PHP-based scheduled job, save the wp-config.php file.
5. Open FluentCRM Settings
Now, open the FluentCRM plugin settings in your WordPress admin dashboard.
Related Topic: FluentCRM Frontend: How to Create a Dashboard
6. Go to Tools
In the FluentCRM settings, navigate to the "Tools" tab.
7. Click on Cron Job Status
Within the "Tools" tab, you will find the "Cron Job Status" option. Click on it to proceed.
8. Confirm that the cron status is regular and healthy
On the Cron Job Status page, you should see the status of the cron job for FluentCRM. Make sure that the status is regular and healthy. If there are any issues or errors, you may need to troubleshoot them before proceeding.
9. If the default PHP-based scheduled job running is not disabled, follow the steps above to disable it
If you find that the default PHP-based scheduled job running is not disabled even after adding the code to the wp-config.php file, make sure to follow the steps mentioned earlier to disable it. This step is crucial to ensure that the FluentCRM cron job functions properly.
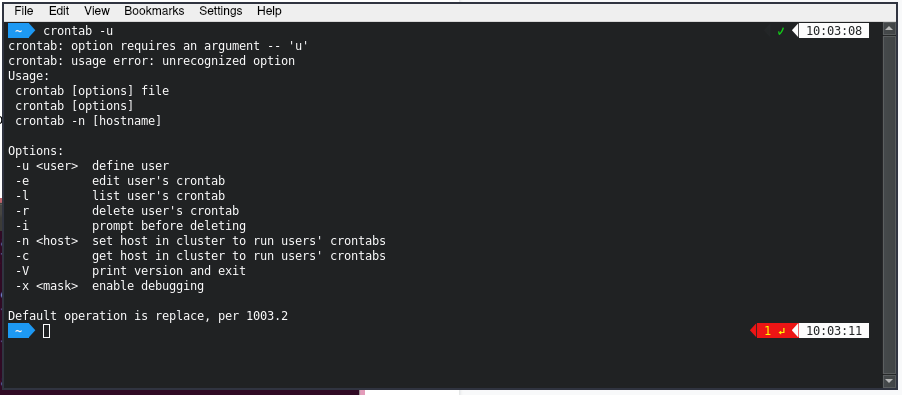
10. Set up a cron job on your server using the following command: */1 * * * * wget -q -O - https://yourwebsite.com/wp-cron.php?doing_wp_cron >/dev/null 2>&1
Now, it's time to set up a cron job on your server. Use the following command to set up the cron job:
*/1 * * * * wget -q -O - https://yourwebsite.com/wp-cron.php?doing_wp_cron >/dev/null 2>&1
Related Topic: Connect Elementor to FluentCRM - Step-by-Step Integration Guide
Replace "yourwebsite.com" with the actual domain name of your website. This command will run the wp-cron.php file at an interval of every minute.
11. Replace "yourwebsite.com" with your actual website domain
Make sure to replace "yourwebsite.com" in the command with the actual domain name of your website. This is important to ensure that the cron job is executed on the correct website.
12. Save the cron job configuration
After setting up the cron job command, save the cron job configuration. The cron job will now be scheduled to run at the specified interval.
13. Test the cron job by waiting for the specified interval and checking if the scheduled tasks are being executed properly
Wait for the specified interval (in this case, every minute) and check if the scheduled tasks in FluentCRM are being executed properly. You can create a test task or campaign to verify if the cron job is working as expected.
14. If the cron job is not working, check the server logs for any errors and troubleshoot accordingly
If you find that the cron job is not working or the scheduled tasks are not being executed, it's important to check the server logs for any errors or issues. The server logs can provide valuable information to troubleshoot and resolve any problems with the cron job.
15. Make sure to monitor the cron job regularly to ensure that it is running smoothly and the scheduled tasks are being completed as expected
Once the cron job is set up and running, it's crucial to monitor it regularly to ensure that it is running smoothly and the scheduled tasks are being completed as expected. This will help you maintain the efficiency and effectiveness of your FluentCRM campaigns and automation.
Related Topic: Connect FluentCRM to WordPress Multisite - Step-by-Step Guide
By following these steps, you can easily set up a cron job for FluentCRM and ensure that your marketing campaigns and customer interactions are automated and executed at the desired intervals.
If you want to discover other articles similar to FluentCRM Cron Job: How to Set Up a Cron Job for FluentCRM?, you can visit the Tutorials and guides category.

Related Posts: